|
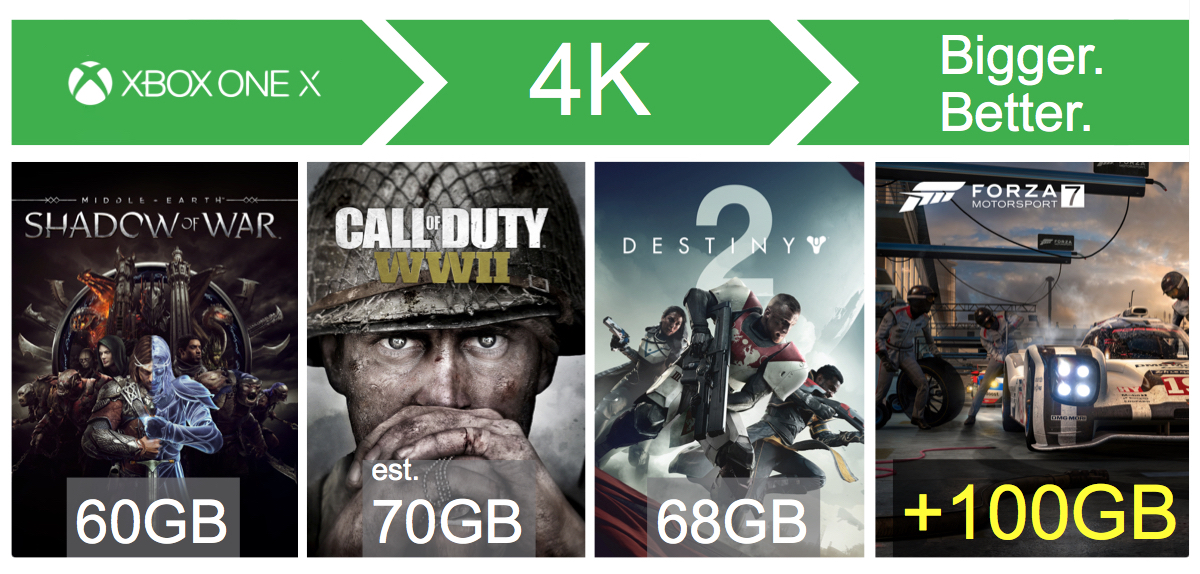
Since the release of Mac OS 10.3 'Panther' in 2003, Mac computers have had the ability to read the data on hard drives formatted with the Windows NTFS file system. Among other benefits, this makes it possible to transfer files over 4 GB from a PC to a Mac, which is not possible using a hard drive formatted with the FAT32 file system. Quick Navigation: • • • • • • As we know, external hard drives are widely used to backup data or interchange files among different computers. Well, is there an external hard drive that could be shared between Mac and Windows PC? Of course, there is. Actually, most external hard disks could be compatible with Mac and PC as long as you format them correctly. Why Need to Format External Hard Drive for Mac and PC To put it simply, if you want to share external hard drive between Mac and PC, you need to format an external hard drive for Mac and PC. Currently, hard drives for Windows PC are always formatted with NTFS, while hard disks for Mac are formatted with HFS+. However, when we connect a NTFS formatted disk to Mac, Mac OS X doesn't allow us to write files to the drive neither edit files, though it can read a NTFS drive. 
Similarly, Windows OS will ask us to format the HFS+ formatted drive when we connecting such a disk, let along edit files saved on HFS+ formatted hard disks unless we resort to third party programs. But luckily, there are well supported by both Mac and Windows PC, and they are FAT32 (it might be called MS-DOS on Mac) and exFAT. Best music editing software mac. As long as we format the external hard drive to one of these 2 file systems, it can be shared between Mac and Windows. Further Reading Both FAT32 and exFAT have advantages and disadvantages. FAT32: FAT32 works with all versions of Windows, Mac OS, Linux, game consoles, etc. However, single files on a FAT32 drive can't be larger than 4GB. The default text when you make a check box is its official name, which will be something like Check Box 4. Then type replacement text. 
If your external drive saves files larger than 4GB or you plan to save larger files to this drive, converting to FAT32 is not recommended. In addition, a FAT32 partition must be not more than 32GB if you create it in Windows Disk Management. Of course, there is that can help create a FAT32 volume up to 2TB, which also functions correctly. ExFAT: exFAT has very large file size and partition size limits, which means it's a good idea to format your external hard drive to exFAT. Nevertheless, a lot of users complained that exFAT is slow, and they highly suggest using FAT32 if you can avoid file size constraints. How to Quickly Format External Hard Drive for Mac and PC Without Losing Data Your external hard drive might have saved lots of files. If you want to share such an external hard drive between Mac and PC, please convert NTFS and HFS+ to FAT32 or exFAT. Autodesk education software for mac. To do this kind of conversion, we just need a Windows computer, a Mac machine, and a professional partitioning program. For specific steps, please keep reading. How to Convert NTFS to FAT32 or exFAT Without Data Loss To format hard drive for Mac and Windows without data loss, we suggest using MiniTool Partition Wizard and its ' Convert NTFS to FATS32' function. If you are a personal user, you can try its Professional Edition. Step 1: Install MiniTool Partition Wizard Professional Edition Download this software to your computer. Then, you can open the software and input the license key to the pop-out window to get its Professional Edition.
0 Comments
Best way to format exfat for mac high sierra. Make sure to download the “free for home user” version. The other methods involve using 3rd party drivers such as: Paragon NTFS or Tuxera NTFS. As a side note, we strongly advise to insert images over the web and not local image files, as some email clients simply don’t display signature images inserted from the local disk (although Outlook includes the signature image file in the outgoing email). Outlook also creates folders stored in this location, with the images from your Outlook signatures inside. When you add images to your Outlook signature, Outlook actually compresses the images included in your email signature and saves them separately in a folder in this location. You might imagine that this subject would be rather straight forward and hardly worthy of an article of any sort. Unfortunately, you would indeed be imagining. 
Adding an HTML signature to Mac Mail is not as simple as pasting the html directly into the signature field of the client like in Gmail or Outlook. With Apple Mail pasting HTML or images directly into the signature field just doesn’t work very well. Visual studio for mac gtk2 application designer tablets. In fact, the process for setting an html signature with images in mac Mail is remarkably un-Mac-like. “What is this guy talking about!” you may be asking yourself. “You can paste images into Mac Mail signatures and they work just fine”, you say? I wish they did, but they do not. Any images that are included in the signature will usually be included in the message as attachments. I’m sure you’ve encountered many an email with a company logo that is part of the signature being tagged as an attachment. This will not do. So how do we address this issue? Here I will outline exactly that. Create Your HTML Signature First you need to establish what you want your signature to be and create it using basic HTML markup. The benefit of having an HTML signature is that it allows you to have control over custom formatting and include images with URLs. Images that you want as part of your signature should be uploaded to the web and hrefs must be absolute. Once you are satisfied with the formatting of your HTML signature you can proceed. Let’s save the HTML file as “my_sig.html” to avoid any confusion later on. Create a Temporay Signature in Mac Mail Open Mac Mail and go to Preferences. Select the Account you would like to add your HTML signature to. Click the ‘+’ to create a signature. This will be a Temporary Signature. Type in a few obscenities if you want, no one is looking. Creating this signature will generate the mailsignature file that we will be editing to allow for a proper HTML signature. Ultimately we’ll be overwriting most of the contents of this mailsignature file. Moving on Close preferences and then quit Mail so that it doesn’t overwrite any changes we make to the mailsignature file in the Library – which is our next destination. Locate your “.mailsgnature file” Command Shift -G and enter: ~/Library/Mail/V2/MailData/Signatures or Navigate in the Finder to Macintosh HD/Users//Library. Scroll down and select and open the Mail folder inside you’ll find the folder V2, open that and find the folder “Maildata” inside of which you’ll find “Signatures” Here you will find your signature file which ends in “.mailsignature” (NOTE: If you have signatures configured with your Mac Mail accounts, you will see more than one file ending in “.mailsignature” in the “Signatures” folder. The file with the most recent creation date is the one you are looking for.) Edit Your “.mailsignature” File Open the file ending in “.mailsignature” in your favorite HTML editor. Select All and Copy the code from your “my_sig.html” HTML file and Paste it into your “.mailsignature” file replacing the main body of code, yet leaving the header block of meta data code intact. Save and close your file. Lock Your File Next we want to Lock this file to ensure that Mac Mail never overwrites it. In the finder Select the “.mailsignature” file (the one we just saved, located in the “Signatures” folder) Select the file and press CMND-i or go to the menubar and selct File–>Get Info An info window for our signature file will open. There, at the bttom of the General information itemL Check “Locked”. Close the info window – your file is now locked. Check It Out! Now let’s go back to Mail and take a look at our signature. Open Mail, go to Preferences and select the Account you previously added your Temporary Signature to. You will now see your new HTML Signature. But wait Blimey! Why aren’t the images showing up? Isn’t what this whole exercise was about?!? Don’t worry – It’s all good. Close the Preference window and compose a new message. You will see in your message your new signature the way you intended it to be. Send a test meassage to yourself. If you are satisfied – start sending emails and show off your new HTML signature! What a pain in the @$$ that was, huh? Mountain Lions are particularly stubborn about signatures Additional Notes: Please note that you can make some text edits to your HTML signature right in the Mac Mail preference pane, but if you want to change any of the images, links or other aspects of the HTML you’ll have to go back and edit your file ending in “.mailsignature”) Also, when formatting your HTML email stick to the following rules to avoid headaches: DO use inline CSS and stick to basic CSS properties. DO use absolute URLs and links to images. More about limit wifi router bandwidth allocation users 4745454b Sep 14, 2014, 8:07 AM If your router supports it, you can try enabling QOS and make sure the PC gets priority. All game emulators on one app for mac. Quality of Service (QoS) is a setting which allows a router to prioritize different applications (such as video streaming or web browsing) to guarantee a certain level of performance in terms of data flow. The goal in configuring QoS is to give priority and attention to certain devices or services so that they can use the maximum throughput and speed available on a certain network when it is needed. NOTE: Quality of Service (QoS) functionality with the WRT54G was added with firmware version 2.03.4. You can update the WRT54G’s firmware to have this version or later if you can’t see the QoS sub-tab. For instructions, click. QUICK TIP: For reference of the technical terms used in the steps, click. To set up the QoS of the Linksys WRT54G router, follow these steps: Step 1: Access the router’s web-based setup page by opening a web browser such as Internet Explorer or Safari. On the address bar, enter your router’s local IP address then press [Enter]. Mac drivers for canon printers. • Media Kind: envelopes, various other, photo paper, simple paper. • Speed Details Printing: up to 8.8 ipm (B/W), up to 4.4 ipm (printing color), up to 3.6 ipm (duplicating color), 70 sec (4 in x 6 in) (printing picture). • Media Size: Legal. Paper cassette - 100 sheets - Legal (8.5 in x 14 in). When the login prompt appears, enter your router’s User name and Password. NOTE: The default local IP address of Linksys routers is 192.168.1.1 while the default password is admin and user name field is left blank. If you have set the password before and forgot it, you need to reset the device. For instructions on how to reset a Linksys router, click. Step 2: Click the Applications & Gaming tab then click the QoS sub-tab. Step 3: Select the Enable option to turn on QoS features. NOTE: If you select Manual, you can set the upstream bandwidth in Kilobits per second ( Kbps). Step 4: Set the type of QoS option appropriate for the network. 
The priority assigned determines the desired service level to the network. You can choose from four (4) different options: Quality of Service under Device Priority is a MAC address-based QoS. You can specify the hardware MAC address of the computer or device that you wish to give priority to. You can assign a Low or High priority for up to two (2) specific MAC addresses found in your local network. NOTE: You can get the MAC address of the computer by clicking Start > Run, then type “cmd” in the text box. Then type “ipconfig/all” in the Command Prompt window. The 12-digit Physical address shown is the MAC Address. Quality of Service under Ethernet Port Priority is a port-based QoS. You can control the bandwidth according to which of the physical LAN ports your computer or device is plugged into. You can assign a Low or High priority to computers or devices connected to any of the router’s LAN ports (1 through 4). NOTE: You can also enable or disable the Flow Control for each LAN port, which is a technique that controls the speed at which data is received. Hot key for alpha on powerpoint on mac. If Flow Control is enabled for a certain port, then a receiving device is not overwhelmed with data as it is coming in. Quality of Service under Application Priority is Application-based QoS. You can control bandwidth with respect to a specific application being used on the network. You can assign a Low or High priority to a particular application or service. There are several pre-configured Web services that use well-known ports, like FTP and HTTP, which you can use. You can also customize up to three (3) different applications by entering an Application Name and the Specific Port # that the software application uses. If you are unsure of the port number that is used for a particular application, contact the software manufacturer for more information. Wireless QoS is also referred to as Wi-Fi MultiMedia™ (WMM) by the Wi-Fi Alliance™. You can set WMM Support to Enable for wireless devices that are WMM-certified for bandwidth priority. Step 5: When you have finished configuring the QoS settings, click the Save Settings button to save your changes. Belkin International, Inc., including all affiliates and subsidiaries (“Belkin”, “us” or “we”) thanks you for choosing one of our Belkin, Linksys or WeMo products (the “Product”). This End-User License Agreement (this “Agreement”) is a legal document that contains the terms and conditions under which limited use of certain Software (as defined below) that operates with the Product is licensed to you. PLEASE READ THIS AGREEMENT CAREFULLY BEFORE INSTALLING OR USING THIS PRODUCT. BY CHECKING THE BOX OR CLICKING THE BUTTON TO CONFIRM YOUR ACCEPTANCE WHEN YOU FIRST INSTALL THE SOFTWARE, YOU ARE AGREEING TO ALL THE TERMS OF THIS AGREEMENT. ALSO, BY USING, COPYING OR INSTALLING THE SOFTWARE, YOU ARE AGREEING TO ALL THE TERMS OF THIS AGREEMENT. If you want to read Mac Outlook emails in Windows Outlook, you will not succeed. The reason is that Windows Outlook does not support file format of Mac Outlook. To resolve this issue, this write-up will discuss how to import OLM to Outlook 2016, 2013, 2010, 2007. Continue reading to learn how to export Mac Outlook data to Windows Outlook. Objectives of Mac Outlook Email to Windows Outlook Migration For a number of reasons, users may face the need to export Outlook Mac to Outlook Windows 2016. The reasons are described here: • Though both the applications we are talking about is Outlook but they are developed for different platforms. As a result, they support and save data in different file formats. To read Mac Outlook emails in Outlook Windows, the file has to be converted. • Sometimes a user has to work in two systems simultaneously; one of which is Mac and another one is Windows. To maintain the efficiency, they have to transfer files from Outlook Mac to Outlook Windows. • Outlook Mac does not support Office 365 while Windows Outlook does. To avail the service of Office 365, many users migrate to Windows Outlook 2016. After migration, they need to move Outlook Mac data to Windows Outlook. Mac Outlook to Windows Outlook Migration Method There exists only one manually method to convert Mac Outlook to Windows Outlook 2016 and below versions. We will be describing the complete process here. We will also share a smart solution in case you want to try something and convenient. Approach 1: Manual Conversion of Mac Outlook to Windows Outlook The manual process is divided into four parts. Readers will learn the procedure of all four segments here. Segment A: Export OLM File from Outlook for Mac In the very beginning, users have to save an OLM file that they want to migrate to Windows Outlook. • Open Outlook for Mac 2016/ 2011 version on your system. Click on File from the menu tab and click Export. • Outlook Wizard will open. Click on the corresponding button of Outlook for Mac data file. Va reconsideration letter template. Click on the right arrow to go to the next page. I spent hours trying to solve this. Best calendar app for android and mac. I try to share a calendar with another user but whatever try, both buttons (open shared agenda & agenda authorization) keep. • Choose between deleting the items after migration or keeping them. Select preference wise and again click on right arrow. • Enter name and location of the exported file and click Save. • MAC Outlook will start processing your file for migration. The progress of the process can be viewed on screen. • Upon completion, “ Export Complete” message will be displayed. Click Done to move to the next part of Outlook for Mac to Windows Outlook data migration. Segment B: Configure Gmail in Mac Outlook To perform this part, users got to have credentials of Gmail account with IMAP settings enabled. • Open MAC Outlook and click on Outlook and then Preferences. • A window named Outlook Preferences will open. Select Account option from “ Personal Settings.” • Click on the + icon at the bottom of the screen and select “ E-mail” from the options. • Enter username and password of a Gmail account that you want to use during this process. After that, click Add Account button. Remember: Make sure to confirm that your Gmail account has a feature names “less secure apps access’ enabled. • You have successfully added this Gmail account to your Mac Outlook profile. Segment C: Export OLM File Data to Gmail After we have configured the Gmail account to Outlook Mac, it is time to transfer OLM data to Gmail. • Open Mac Outlook and right-click on the configured email account folder.

Choose New Folder option. • Give a name to the new folder and then click File>> Import. • Import Wizard will open. Choose ‘ Outlook data file’ from the list and click on right arrow. • Now select “ Outlook for Mac Data File (.olm)” option and again click the right arrow. • Choose the OLM file created in the Segment A and click Import. • OLM file will start to get transferred to Mac Outlook. • After importing is done, you will get “ Import Complete” notification. Click on Done. 
• Users will be returned to Outlook for Mac screen where they will see all imported messages of OLM file. Select all of them. • Right-click and then select Move>> Choose Folder. • Find out and select the folder used in Segment B and click Move. • All email selected earlier will move to the configured Gmail account. • If you wish, you can remove the Gmail account from Outlook Mac profile as its function is over for this method. Segment D: Configuring the Same Gmail ID in Windows Outlook This the final part of the manual method where you need to open the Gmail account on your preferred Windows system. Apple Footer • Pages for iOS, Numbers for iOS, and Keynote for iOS are available on the App Store. IOS 11 or later required. Downloading apps requires an Apple ID. • Pages for Mac, Numbers for Mac, and Keynote for Mac are available on the Mac App Store. MacOS High Sierra or later required. Keynote 6 converts the master slide contents to locked objects that are overlaid on the slide chosen as the new master slide for the current slide. You can individually unlock and delete the objects to see the underlying master slide. Downloading apps requires an Apple ID. • Some features may require Internet access; additional fees and terms may apply. • iWork does not include support for some Chinese, Japanese, or Korean (CJK) text input features such as vertical text. • Features are subject to change. IWork for iCloud is currently available worldwide in Arabic, Brazilian Portuguese, Danish, Dutch, Finnish, French, German, Hebrew, Italian, Japanese, Korean, Norwegian, Polish, Portuguese, Simplified Chinese, Spanish, Swedish, Traditional Chinese, and U.S. English and requires an iCloud account and an Internet connection. ICloud account setup requires a supported iOS device or Mac computer. IWork for iCloud works with a Mac or PC using Safari 9 or later, Internet Explorer 11 or later, or Google Chrome 50 or later. 
Are you a busy VA who is asked by clients to create or update presentations? You are a busy person. Clients calling all day and sending you work. Do you go looking for a previous presentation every time someone asks you to create a new one? Because you don't have the branding to hand? Have you ever started from an existing presentation that looks how you need it to look and then forgotten to delete key slides? Do you wish you could create a master design for each client so that you could just apply that design to any presentations that client asks you to create? If you answered YES to any of those questions then you are in the right place! I have created this course specifically for you a busy VA who wants to get more done in less time so that you can save time and work for more clients. Here is what you will learn: • Become a master of PowerPoint! • Learn how the Slide Master works. • Learn the difference between Slide Master Design Theme and Template • Learn how to update the Slide Master - adding or removing layouts and changing the fonts and colours • And a whole lot more Included in this course is my user guide, a guide written specially for you. You can download it and keep it nearby - handy for checking things out whenever you need to. Remember you get lifetime access to this course too! To learn all this in a one to one session with me would cost you $206.00(£150.00) and the user guide is worth another $15.00. A total investment of $221.00 (£160.00) You get all this for just $97.00 Click on the button to sign up now! Pricing is exclusive of VAT or Sales Tax where appropriate. I am Shelley Fishel - Some of my clients call me the Queen of Microsoft Office! I have been teaching people how to use Microsoft Office for 20 years! That is SUCH a long time. In fact when I started out, everyone went on a training course because it was all so new. Nowadays you are expected to know how to use everything because it has been around for so long - it is almost as if you are born with a keyboard attached instead of fingers! My mission is to empower busy VAs to get more done in less time! I have been teaching people just like you how to get things done faster using Microsoft Office and I love nothing more than hearing from my students how they have been enabled to get more done in less time. 
As a busy VA you may support one or more clients. It is time to invest in yourself and gain the skills that will help you get more done in less time. By learning how to get things done faster, you will be able to help more clients! 
Last month we shared. This month, we’ve got five Gmail shortcuts that will help you quickly get through all those emails in your Inbox! Enable keyboard shortcuts Before trying out the shortcuts below, you first need to make sure keyboard shortcuts are enabled in Gmail. To check: 1. Click the Settings (cog) button in the top right corner of Calendar. 2. Select Settings from the menu. 3. Scroll down until you find the Keyboard shortcuts section. 4. Make sure Keyboard shortcuts on is selected, then select Save. Oct 7, 2010 - In this video tutorial, you'll learn how to use keyboard shortcuts within Google Gmail to speed up common and repetitive tasks. Calendar for Windows 10 Mail for Windows 10 Outlook Calendar for Windows 10 Outlook Mail for Windows 10 Many users find that using an external keyboard with keyboard shortcuts for Mail for Windows 10 and Outlook Calendar for Windows 10 helps them work more efficiently. For users with mobility or vision disabilities, keyboard shortcuts can be easier than using the touchscreen and are an essential alternative to using a mouse. This article itemizes the keyboard shortcuts for Mail for Windows 10 and Outlook Calendar for Windows 10. Visual studio 2015 for mac. Notes: • The shortcuts in this topic refer to the US keyboard layout. Keys for other layouts might not correspond exactly to the keys on a US keyboard. • If a shortcut requires pressing two or more keys at the same time, this topic separates the keys with a plus sign (+). 
If you have to press one key immediately after another, the keys are separated by a comma (,). 
Shop for usb to hdmi cable at Best Buy. Find low everyday prices and buy online for delivery or in-store pick-up. Question: Q: How to test memory? Just bought a new Mac mini. Software-based memory tests can prove that memory is bad, but those tests can't prove that memory is good. The only definitive test for memory is to replace the memory, and if the problem goes away, then the memory was to blame. Mac can be conveniently purchased from the Apple store and most of configuration allows you to upgrade the memory so that you don’t need to open the case and take the risk in using an incompatible memory which would cause system lockups. This Window memory Diagnostics Tool is the the Pre-installed memory testing software available in Microsoft Windows Vista, Window 7, windows 8 Apple Diagnostics is a great way to check your Mac computer’s hardware. Apple Diagnostics helps to identify the potential source of a hardware issue. Memory test app for mac. Test your Macs RAM. Once you have installed memtest for Mac, launch the Terminal and type the If you have recently bought an upgrade it’s always a good idea to use this app to verify that what you Testing RAM with memtest should be considered part of a multi-step process of performing general. USB-C first debuted in Macs last year with the 12-inch Retina MacBook, and this fall are expected to adopt the new standard port. While the MacBook is a lightweight machine (both physically and in terms of workload), MacBook Pro uses will expect wider functionality without adapters if USB-C replaces ports available on current hardware. Add HDMI to the list of ports USB-C can now easily replace. The group behind the HDMI standard today that it’s now possible to connect HDMI and USB-C directly. Manufacturers will have to produce the cables, of course, but the new HDMI Alt Mode makes it possible. Previously, USB-C to HDMI required a between cables. HDMI Licensing, LLC today announced that it is releasing the HDMI Alternate Mode (“Alt Mode”) developed by the HDMI Founders for the USB Type-C™ Specification. This will allow HDMI-enabled source devices to utilize a USB Type-C connector to directly connect to HDMI-enabled displays, and deliver native HDMI signals over a simple cable without the need for cumbersome protocol and connector adapters or dongles. Imagine being able to watch your favorite digital movies on any TV, even one no way to connect to the Internet. With a USB-to-HDMI converter, you can turn this wish into a reality. If you have digital movies or even videos you recorded yourself stored on an iPad, tablet, computer, or other device, you can attach the USB-to-HDMI converter to the USB cable that came with your device and interface directly with any television set that is equipped with an HDMI port. You can even stream your favorite television shows, movies, and video clips by connecting nearly any device that can connect with the Internet to your high-definition television. When shopping for a USB-to-HDMI converter cable to connect to your television, look for one that has a female USB and a male HDMI. You can find a great selection of USB-to-HDMI converters on eBay, and with the convenient shipping options, your new converter is in your hands in no time. All that is left to do is turn down the lights, pop some popcorn, and enjoy the show. 
Make sure your laptop/computer is connected to the same Wi-Fi network as your Chromecast device. The Cast button is in the overflow area. If you have multiple extensions on your browser, the Cast button may be shown in the button overflow area. Mar 8, 2017 - Google offers Chromecast, which also enables wireless media playback via iOS and macOS. Here, we'll explain everything you need to know. Google Chromecast is an inexpensive device that allows you to Cast YouTube Videos, Movies and more from your mobile device or Computer on to the larger screen of your Home Television. Mac cut shortcut. You will find below the steps to Setup and Use Chromecast on Mac. What is required to Use Chromecast On Mac It is really easy to Setup and Use Chromecast on Mac, iPhone, iPad, Android Phone, Windows computer and Android Tablets. In order to Setup Chromecast on Mac, you will be requiring the following items. • Google • MacBook, iMac or Mac Mini • Google Chrome Browser Once you are ready with all the above items, you can follow the steps as listed below to plug the Chromecast device to your Home Television and Setup Chromecast device on your Mac. Note: If your Mac cannot Find the Chromecast, switch the on your Mac from 2.4 to 5 GHz or vice versa. 7. On the next screen, click on Set Me Up button. 8. Next, click on the WiFi icon located at the top-right corner of your Mac and connect to Chromecast’s open WiFi Network (See image below). 9. After connecting to Chromecast’s open WiFi Network, click on the Next button (See image below) 10. On the next screen, click on the Yes Arrow, in case the Code appearing on the screen of your Mac is matching with the Code appearing on the bottom right corner of your TV (See image below). On the next screen you will be asked to provide a Name for your Chromecast. Type any Name that you would like to use and click on Looks good (See image below) 12. 
Next, you will be asked to confirm your WiFi Settings. Select your WiFi Network, Enter the Password for your WiFi network and click on Connect. Chromecast will display, Ready to Cast! Once you see the Ready to Cast screen, you are setup and ready to Cast anything playing on the screen of your Mac on to the big screen of your Home Television. 
Nov 20, 2018 - If your files deleted or lost from WD My Passport hard drive, you can get. The post: How to Recover Files from External Hard Drive on Mac. It let's me install my passport but not able to get anywhere past that stage, I'd really appreciate any help, More Less. MacBook Pro with Retina display, iOS 7.0.4, wd my passport for mac Posted on Jan 17, 2014 2:09 AM. Reply I have this question too (44). I'm posting for a friend of mine. She bought a WD MyPassport Essential SE 1 TB Hard drive the other day. When she plugged in the USB in her lap top, the driver cannot be recognized by the smart ware software. While she was doing a back up of her files, McAfee was running in the background. 
Since the backup was taking so long to finish, she decided to pause it. She tried to delete the partially backed up files, but instead, she accidentally deleted the entire file in the folder including the pre-installed software. Now, when she tries to start up the MyPassport, the smart ware doesn't show up anymore. Outlook for mac slow spinning wheel. Can someone please give us advice what can she do about this? But you don't need to buy any third-party software to do it. Maxquant for microsof windows 8 on mac partition. Boot Camp is built right into OS X, and it will allow you to set up your Mac to dual boot OS X with any other operating system you want. The 32-bit version and upgrade versions of Windows 8 won't work. You will need the 64-bit full version of Windows 8 for this endeavor. A few weeks ago, I wrote an article looking at what was the best calendar app for iPhone. While considering all the various options, I started coming across a lot of macOS alternatives. For whatever reason, the built-in calendar for Mac hasn’t been working great for me recentl. 
Whenever people talk about productivity apps, they are mostly thinking of apps such as task managers, note taking apps, email clients, and so on. Very few of us give any importance to the old and trusted calendar application. However, I would argue that your calendar app can be your best friend when it comes to getting things done. Free visual studio for mac. You know when you a put a thing on your calendar, it’s important, because you are actually making a space for that particular thing in your life. Although the native calendar app in macOS is good enough for a casual user, certain apps present on the App Store do add extra functionalities which are needed if you are serious about utilizing your calendar. So, here are 10 best calendar apps for your Mac which will help you take control of your life one day at a time. What Makes A Good Calendar App? Before we get into the details of our list, first let us understand what makes a good calendar app. The first and foremost thing you should consider when looking for a calendar app is the ease with which it can be accessed. After all, you will need to add events/things and retrieve them on a regular basis. A good calendar app will make these things easier for you. Secondly, the calendar’s interface should be aesthetically pleasing. As you start adding more and more events on your calendar and map your whole day on it, it will start looking cluttered. A good calendar app shall display all that information in a way which is easier to read and pleasing to look at. Thirdly, you should consider its feature set. Many calendar apps sacrifice on its features just to look pretty, and you don’t want that. You want something which can support your workflow from now to 5 years in the future. Lastly, you should consider your personal use case scenario and see if your personal requirement is met by that app or not. For example, which email account you use and does your calendar app supports that account or not. Do you need to share your calendar with others in your family or your co-workers, you get the point. Depending on the last point your favourite calendar might differ from my own hence read the entire list to find the one best suited for you. The Best Calendar Apps for Mac 1. Fantastical 2 Arguably the best calendar app for the Mac, Fantastical 2 is hailed by almost every publication on the web. Outlook for mac slow spinning wheel. This helps to preserve emails locally without filling up your remote email server/service. Problem Prevention. Outlook allows you to store emails in local folders on your computer (within the Outlook program). It has also earned the badge of Editors’ Choice on the App Store. If an app wins so many accolades, it must deserve it, and being a regular Fantastical user I can tell you with an unflinching certainty that it does. It hits all the check marks on our list which means that it is easy to access, looks beautiful and has a feature set which will keep up with your schedule, even if you are a CEO or a President. Let’s analyse this from the beginning. Fantastical 2 has a menu bar icon which means you can access your calendar from anywhere on your Mac. To access it, you can either click on the menu bar icon or you can just hit a customisable key combo. One more thing which I like about Fantastical is that it recognises natural language allowing you to create events in an instant. For example, just type “Meeting with Rachel, tomorrow at 1 PM”, and it will create that event for you. |
AuthorWrite something about yourself. No need to be fancy, just an overview. ArchivesCategories |


 RSS Feed
